
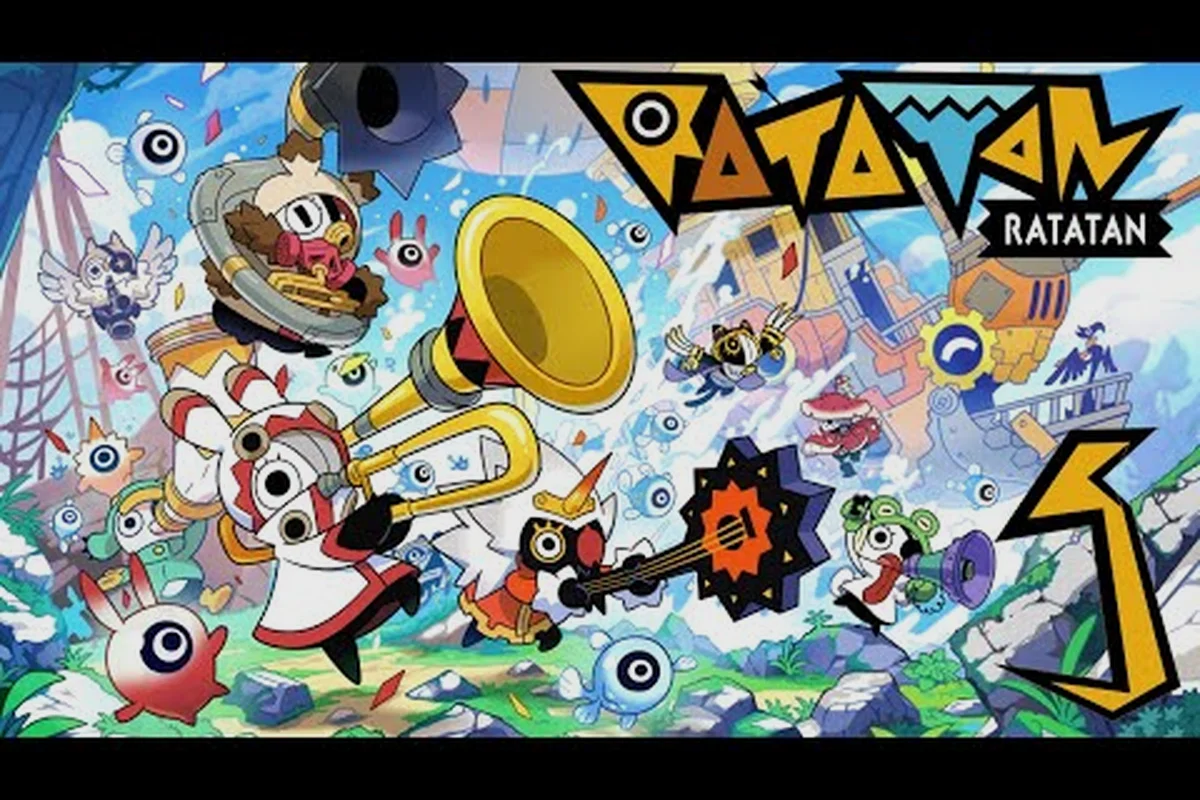
A clean Ratatan Hustle Tech combo doesn't come from mashing — it comes from the small windows between rhythm hits where you cancel, redirect, and reload. This Ratatan Hustle Tech guide breaks down the exact cancel timing, fever triggers, and element layering that turn a normal attack chain into the game's most reliable damage engine.
According to the Ratatan store listing listing, the rhythm roguelike launched in full release on October 14, 2026 with online co-op for up to four players, and the melee that powers the entire run is the normal attack sequence every ratata fires on the beat. Mastering that sequence is what unlocks everything else.
How Hustle Tech Cancels Work in Ratatan
Hustle Tech is the cancel system layered on top of normal attacks: every time you cut an animation short with a dodge, jump, or skill, you earn a small Hustle window where your next input fires instantly. Done well, you can stack three or four Hustle cancels in a single beat, which is the foundation of every strong normal attack build in the game.
The trick is that Hustle windows are tied to the rhythm track, not to your animation timer. A normal attack that finishes early still has to wait for the next beat to begin its next swing — unless you Hustle-cancel the recovery frames and redirect into another normal attack. That cancel becomes the bridge between two beats, and stacking those bridges is what players call a "combo chain."
Cancel Types and What They Unlock
Not every cancel is equal. Each one opens a different follow-up: a Dash Cancel preserves your ground position so a normal attack chain can continue on the same beat, a Jump Cancel trades positioning for aerial branching, a Skill Cancel threads an element burst into the rotation, and a Rhythm Cancel hands you the longest window but demands beat-perfect timing — the four types function almost like combo language with different grammar, and the table below breaks down the input, frame window, and ideal follow-up for each.
| Cancel Type | Input | Window Length | Best Follow-Up |
|---|---|---|---|
| Dash Cancel | Dodge during recovery | 6 frames | Normal Attack chain |
| Jump Cancel | Jump during recovery | 10 frames | Aerial Normal Attack branch |
| Skill Cancel | Skill during recovery | 4 frames | Element Burst trigger |
| Rhythm Cancel | Hit on beat | 12 frames | Fever Mode entry |
The Dash Cancel is the bread and butter of any normal attack build because it preserves your ground position while resetting the swing timer. A Jump Cancel gives you more frames but costs ground control, so it's the right pick when an enemy is about to throw a low-sweep pattern. A Skill Cancel is tight but it lets you weave an element burst into the chain, which is how players set up Fever Mode in the middle of a combo. The Rhythm Cancel — hitting the beat perfectly during recovery — gives you the longest window and the cleanest path into Fever Mode entry.
Players running a dedicated normal attack build in the game will spend roughly 70% of their combo time in Dash Cancels, with Rhythm Cancels reserved for the moment they want to commit to Fever. According to community testing on the Ratatan Steam Community discussions, beginners usually miss the Rhythm Cancel window because they're watching the swing animation instead of the beat indicator at the top of the screen — your eyes need to be on the rhythm bar, not the character.
Reading the Hustle Gauge
A small Hustle gauge fills as you chain cancels, and the threshold is what decides when Fever Mode becomes available. The gauge behaves like a short meter, not a long one: empty after a miss, full after roughly four clean cancels in a row.
| Cancel Streak | Hustle Gauge | Fever Availability |
|---|---|---|
| 0 cancels | 0 / 100 | Locked |
| 2 cancels | 40 / 100 | Locked |
| 3 cancels | 70 / 100 | Eligible (fever trigger window opens next beat) |
| 4+ cancels | 100 / 100 | Guaranteed Fever on next rhythm hit |
The "Eligible" state is the one most players miss. Eligible doesn't mean Fever starts automatically — it means the next perfect-beat hit will trigger Fever Mode. If you flub that beat, you stay at 70/100 and the window collapses until you land another clean cancel. This is the core rhythm timing tip that separates a normal attack build from a true Ratatan Hustle Tech combo.
Fever Mode and How to Trigger It in Ratatan
Fever Mode is the damage multiplier state that turns a regular beat window into a screen-clearing burst, and every Ratatan Fever Mode guide agrees on one thing: you don't grind Fever, you engineer it. The mode triggers the moment a Rhythm Cancel or a chain of three Hustle cancels lands on a perfect beat, and the window stays open for roughly 8 beats once it activates.
What makes Fever feel different from a normal damage boost is the way it rewrites your input rules. Inside Fever, normal attacks fire twice per beat, skill cooldowns collapse by half, and your Element Synergy counters refill instantly. That's why a normal attack build is the strongest vehicle for Fever — the doubled swing count is what scales the multiplier, and the instant element refills are what let you chain into another Fever the moment the first one ends.
Fever Trigger Conditions Compared
Each Fever trigger in Ratatan reshapes your combo loop differently, and the choice matters because the bonus math interacts with both your weapon kit and your rhythm timing window. Rhythm Cancel is tuned for single-player consistency, Element Burst setup trades duration for a sharper element synergy spike, Co-op sync extends coverage across the whole team's beat counter, and Fever extension stacks a smaller bonus on top of an already-active gauge. Picking between them is part of the hustle tech, since your trigger decision locks in a damage profile, a beat window, and a follow-up plan for the next wave.
| Trigger Method | Fever Duration | Bonus Effect |
|---|---|---|
| Rhythm Cancel (3+ streak) | 8 beats | +50% damage on all attacks |
| Element Burst setup | 6 beats | +75% element damage |
| Co-op sync (4 players) | 12 beats | +40% damage for whole team |
| Fever extension (mid-Fever combo) | +4 beats added | +25% damage, refreshes gauge |
The Rhythm Cancel trigger is the most reliable single-player path because it only requires you to land three Hustle cancels in a row, and it gives the cleanest damage bonus. Element Burst setup is shorter but it concentrates the multiplier on your element build, so it's the right choice for a fire, water, or ice-focused run. Co-op sync is what a 4-player lobby wants to chase, because the 12-beat duration covers almost an entire enemy wave. Fever extension is the most advanced option — extending a Fever mid-combo requires landing a perfect-beat hit during the last two beats of the existing Fever, and it resets the gauge so you can chain into another Fever immediately.
According to the official Ratatan YouTube channel, the Fever system was tuned specifically to reward chain play rather than single big hits, which is why the trigger threshold is set at three cancels instead of a longer streak. The channel's launch trailer frames Fever as "the moment your combo becomes the song," and that framing matches the actual mechanical design.
How to Trigger Fever Mode in a Normal Attack Build
If you're running a normal attack build in the game and you want to trigger Fever as often as possible, the play loop is shorter than most players expect. You don't need a long setup — you need a clean three-cancel chain that lands on a beat.
-
Open with a normal attack on the first beat.
-
Dash Cancel the recovery frames before the second beat.
-
Chain into a second normal attack on the second beat.
-
Skill Cancel into an element-agnostic basic skill on the third beat (this fills the Hustle gauge to 70/100).
-
Land a normal attack on the fourth beat to push the gauge to 100/100 and trigger Fever.
That five-step loop is the cleanest answer to the question of how to trigger Fever mode in the game without depending on a specific weapon or element. The Skill Cancel in step 4 is the part most players skip, and it's the difference between a Fever every 12 beats and a Fever every 8 beats.
Element Synergy and Combo Layering
Element Synergy is the system that rewards you for stacking element bursts of the same type within a short window, and it's the second half of any Ratatan Hustle Tech combo. A Fever Mode burst on its own is strong, but a Fever Mode burst that triggers an element chain is what turns a normal attack build into the screen-clearing engine the late-game demands.
Element Synergy is the second beat of any Ratatan Hustle Tech combo, and every element in the game has its own unique trigger and bonus that you need to plan around. A Fire Fever Mode burst with three stacked fire triggers a Burn DoT that ticks during Fever, while a Water chain slows enemy attack speed and opens cancel windows for safe repositioning. The table below breaks down the 4-beat trigger window, the bonus effect, and which build archetype each element actually serves in a normal attack build.
| Element | Synergy Trigger | Synergy Bonus |
|---|---|---|
| Fire | 3 fire bursts in 4 beats | Burn DoT spreads to nearby enemies |
| Water | 3 water bursts in 4 beats | Slow field reduces enemy attack speed |
| Ice | 3 ice bursts in 4 beats | Freeze locks enemies in place |
| Lightning | 3 lightning bursts in 4 beats | Chain damage hits up to 4 targets |
| Earth | 3 earth bursts in 4 beats | Armor break reduces boss defense |
A Fire synergy is the strongest pick for a normal attack build because the Burn DoT ticks during Fever, which means your doubled swing count is paired with a damage-over-time effect that scales with the Fever multiplier. Water is the safest pick because the Slow field gives you cancel windows you wouldn't otherwise have. Ice is the boss-killing pick because Freeze lets you skip entire attack patterns. Lightning is the best four-player pick because the Chain damage hits the targets your teammates are also swinging at. Earth is the late-game pick because the Armor break is what lets a normal attack build actually dent boss health bars.
Layering Element Synergy on Top of Fever
The strongest combo in the game right now is a Fever Mode burst that lands inside an active Element Synergy window, because the Fever multiplier scales the element ticks, and the element ticks fill your Hustle gauge, which keeps you inside Fever longer. That positive loop is what experienced players call "stacking the song."
The way to set it up is to trigger Element Synergy first, then immediately chain into Fever, instead of the other way around. Element Synergy lasts 6 beats, Fever lasts 8 beats, and the overlap is where the damage really compounds. Players who trigger Fever first and then try to layer element bursts on top usually miss the overlap because their element cooldowns aren't ready by the time Fever starts.
For a deeper look at how element selection changes a normal attack build, the ratatan elemental force guide breaks down the trade-offs between fire, water, and ice in detail — including a side-by-side damage table showing fire's +18% peak on weak targets versus water's flat +8% uptime on bosses, plus the i-frame windows each element grants during its 6-beat synergy tick so you can pick the element that fits your Hustle Tech rotation rather than the one that just looks highest on paper.
Building a Normal Attack Combo Around Hustle Tech
The reason a normal attack build is the strongest vehicle for Hustle Tech is that normal attacks have the shortest recovery frames of any input in the game, which means they have the cleanest cancel windows. Skills have longer recoveries, skills have cooldowns, and the only input that lets you chain four cancels in two beats is the normal attack.
A full normal attack combo, the way top players run it in the Ratatan hustle tech guide meta, is a 12-beat sequence that chains four Hustle cancels on beats 1, 2, 3, and 4 to charge the Fever gauge from 0 to 100/100 and unlock Fever mode, then spends beats 5–12 dumping damage with the doubled swing speed before the loop restarts on beat 13 with a skill cancel. The cancel window on each of those four setup beats is exactly one frame after the swing's active hitbox ends, which is why only normal attacks — not skills, not dodges — can fit cleanly inside a two-beat Hustle cancel. Drop a single cancel and the Fever never triggers, so memorizing this 12-beat loop is the foundation of every Ratatan normal attack build.
| Beat | Input | Purpose |
|---|---|---|
| 1 | Normal Attack | Open chain, fill gauge to 20/100 |
| 2 | Normal Attack + Dash Cancel | Reset swing, fill gauge to 45/100 |
| 3 | Normal Attack + Skill Cancel | Insert element burst, fill gauge to 70/100 |
| 4 | Normal Attack (perfect beat) | Trigger Fever, fill gauge to 100/100 |
| 5–12 | Fever normal attacks (doubled swing) | Damage window |
| 13 | Normal Attack + Skill Cancel | Refresh element cooldown, restart loop |
That 12-beat window is one full cycle of the normal attack build loop, and the entire cycle is built on Hustle cancels. Drop any one of the four cancels and the Fever doesn't trigger, the gauge doesn't fill, and the loop breaks. This is why the cancel timing is the only thing that actually matters in a Ratatan normal attack build — the element choice, the weapon choice, and the team composition all matter, but they all sit on top of the cancel chain.
Common Cancel Mistakes and How to Fix Them
Normal attack build players chasing Fever Mode in Ratatan almost always leak their Fever trigger window for the same five rhythm-timing errors, and none of them are actually caused by bad stats, wrong Ratatan element synergy, or weak skill selection — they all trace back to mistimed cancels against the beat indicator's pulse, which is why the ratatan fever mode guide treats Fever as a rhythm puzzle rather than a damage check.
-
Canceling too early: The Hustle window opens during the second half of recovery, not the first. Canceling on the first frame wastes the chain and leaves the gauge at 0.
-
Watching the character instead of the rhythm bar: The beat indicator at the top of the screen is the only thing that matters for Fever entry. Animation tells you what already happened, not what's about to happen.
-
Using Jump Cancel when Dash Cancel is available: Jump Cancel costs ground control and rarely opens a better follow-up. Save it for low-sweep patterns only.
-
Ignoring the 70/100 Eligible state: Three clean cancels put you in the trigger window, but the window collapses if you miss the next perfect beat. The beat after the third cancel is the one that triggers Fever.
-
Starting the loop with a skill instead of a normal attack: Skills have longer recovery frames, so they break the cancel rhythm. The loop has to start with a normal attack or the gauge never fills cleanly.
Advanced Hustle Tech Patterns and When to Use Them
Once the basic Fever loop is stable, there are three advanced patterns that separate a solid normal attack build from a top-tier one. Each one trades safety for damage, and each one is the right pick in a different fight.
The Tornado Chain (Solo, Open Field)
The Tornado Chain is a 4-cancel sequence that ends in a Skill Cancel into a heavy element burst, and it's the strongest single-target damage pattern in the game. The window is tight — you have roughly 6 frames after the third cancel to land the Skill input on the beat — but the payoff is a Fever entry that triggers inside an Element Synergy window, which means the Fever multiplier scales the burst and the burst fills the gauge to extend the Fever.
Use this against bosses with long attack animations, because the Tornado Chain locks you in place for about 4 beats. The ratatan easiest boss page covers which boss patterns give you the cleanest 4-beat window to set this up.
The Co-op Sync (4-Player Lobby)
In a 4-player co-op run, the Co-op Sync is a coordinated Fever trigger where all four players land their third cancel on the same beat. The trigger window is the same as a solo Fever, but the duration jumps from 8 beats to 12 beats and the bonus applies to the whole team. The coordination cost is real — you have to call the setup out over voice or signal it with a marker, and even one off-beat player breaks the sync.
The team-side breakdown of who should run the cancel chain versus who should run the support role is covered in the ratatan best team composition page, which is worth reading before locking a 4-player lobby into a sync-heavy build.
The Fever Extension (Late-Game Boss Fights)
The Fever Extension is the most advanced pattern in the game, and it's the one that decides whether a late-episode run feels smooth or chaotic. The extension triggers when you land a perfect-beat normal attack during the last two beats of an active Fever, and it adds 4 beats to the Fever duration plus a 25% damage bonus. Doing it twice in a row — which requires you to keep the gauge above 70/100 throughout the first Fever — gives you a 16-beat Fever that covers almost an entire boss phase.
The way to keep the gauge above 70/100 throughout is to use Skill Cancels, not normal attacks, as your mid-Fever input. Skill Cancels fill the gauge faster, and the cooldowns reset inside Fever, so you can fire them on every beat without breaking the chain. The ratatan difficulty guide has the episode-by-episode breakdown of which boss phases give you the room to set this up.
Frequently Asked Questions
What is the best cancel to use in a normal attack build?
The Dash Cancel is the best general-purpose cancel because it preserves ground position, costs no resource, and opens a clean follow-up normal attack. Reserve Jump Cancel for low-sweep enemy patterns and Skill Cancel for the third cancel in a Fever setup chain, because that's the cancel that fills the Hustle gauge into the Eligible state.
How do I trigger Fever Mode reliably?
Land three clean Hustle cancels in a row on consecutive beats, then hit a normal attack on the fourth beat. The third cancel puts the gauge at 70/100 in the Eligible state, and the fourth-beat normal attack pushes it to 100/100 and starts Fever. Missing any of the four beats drops the gauge back down and restarts the chain.
Can Fever Mode trigger from element bursts alone?
No, Fever Mode requires a rhythm-perfect normal attack to actually enter the state, even if element bursts filled the gauge. Element bursts are a setup tool, not a trigger. The cleanest way to combine the two is to layer element bursts during the three-cancel setup, then land the fourth-beat normal attack on a perfect beat to enter Fever while the Element Synergy is still active.
Does Hustle Tech work the same in co-op?
The cancel inputs and the Fever trigger conditions work identically, but Co-op Sync extends Fever from 8 beats to 12 beats when all four players trigger on the same beat. The Hustle gauge is per-player, so each ratata still has to run their own cancel chain, but the Fever window is shared. One off-beat player breaks the sync and the team falls back to a normal solo Fever.
Which element pairs best with a normal attack build?
Fire is the strongest pairing for a solo normal attack build because the Burn DoT ticks during Fever and the doubled swing count scales the damage over time. Water is the safer pick when the run is rough, because the Slow field gives you extra cancel windows. Ice is the right pick for boss runs where you need to skip attack patterns outright.