
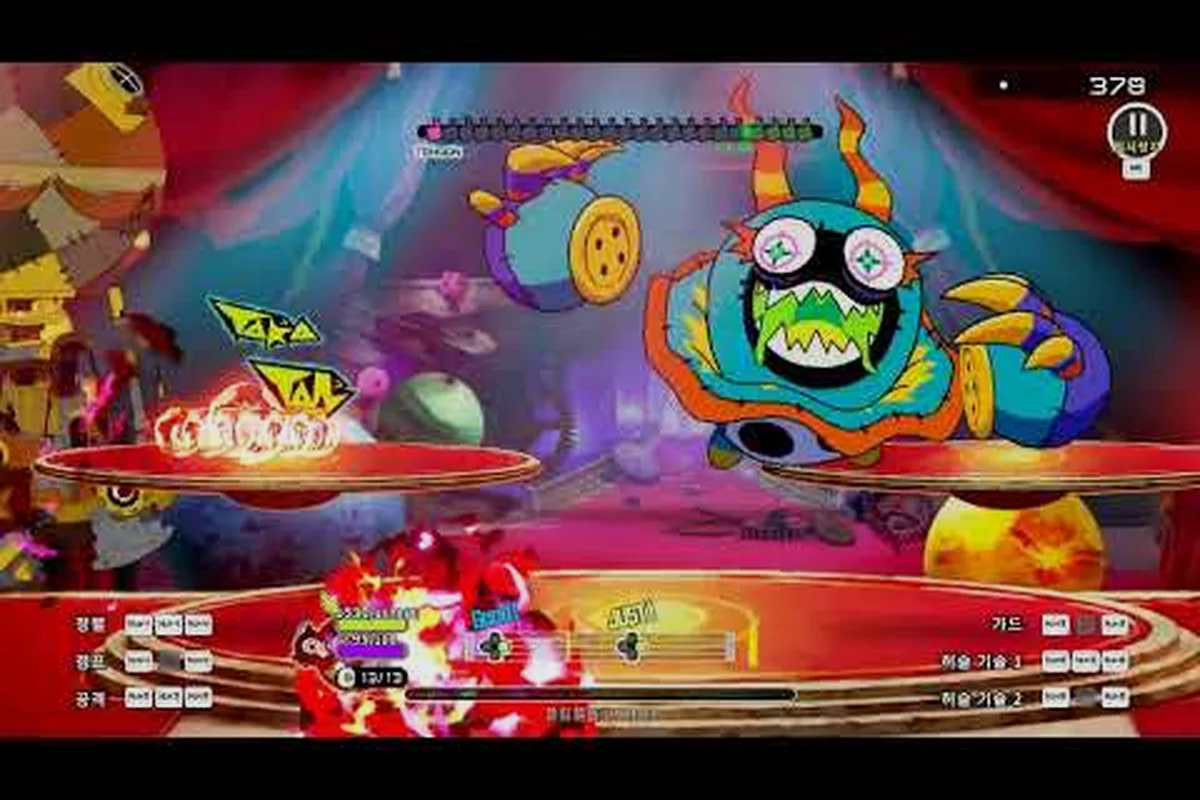
The Ratatan Goddess Altar sits at the heart of the game's meta-progression loop, turning each cleared run into permanent power that carries into the next adventure. Players who ignore the altar will eventually hit a hard wall around Episode 3, when enemy health pools and boss patterns scale faster than any single run can keep up with. This guide breaks down the oath level milestones, the melodium farming paths that actually pay off, and the meta-progression rewards worth chasing first.
What the Goddess Altar Actually Does in Ratatan
The Goddess Altar functions as a long-term investment hub. When a Ratatan completes a run and returns to the hub dock, a portion of the run's earned resources is routed to the altar as Melodium — the dedicated currency that drives every permanent upgrade in the system. Unlike run-scoped pickups that vanish on death, Melodium sticks to the account, which means progress never truly resets even when a run collapses on a late boss phase.
The altar screen divides upgrades into three rough families: Oath Level boosts (which raise baseline stats for every Ratatan and Cobun in future runs), Adventure Unlocks (which add new mechanics, weapons, or shortcuts to subsequent runs), and Cosmetic Shrine Slots (visual rewards that occasionally hide small gameplay bonuses). Most players spend their first 20 hours inside the Oath Level tab because the stat returns there are the most consistent.
The altar is also the place where Oath Milestones trigger. Hitting certain Melodium thresholds raises the global Oath Level, and each milestone unlocks a stack of rewards — including Melodium refunds, extra Cobun slots, and the keys needed to access the Goddess Lottery and Goddess Super Lottery systems. The lottery is where high-tier mythic weapons and rare Cobun cosmetics enter the economy, so skipping the altar early locks players out of the most efficient farming pipelines.
| Altar Tab | Primary Currency | Carryover Type | Best For |
|---|---|---|---|
| Oath Level | Melodium | Permanent account-wide | Stat boosts, run longevity |
| Adventure Upgrades | Melodium + Keys | Unlocked once, always available | New mechanics, shortcuts |
| Goddess Lottery | Lottery Tickets | Per-draw rewards | Cosmetic + small stat rolls |
| Goddess Super Lottery | Super Tickets | Per-draw, rarer pool | Mythic-tier cosmetics |
For a deeper walkthrough of how the altar ties into the wider support desk and dock economy, the Ratatan progression guide covers the surrounding systems that feed resources into the altar between runs — specifically how Cobun assignments, dock delivery bonuses, and run-end salvage values translate into the Melodium pool that powers Oath Level boosts, Adventure Unlocks, and the lottery pipelines outlined above.
Ratatan Oath Level Milestones and What Each One Unlocks
The Oath Level behaves like an account-level prestige track. Every Melodium deposit nudges the counter forward, and tiered milestones bundle the rewards players actually care about. Based on community-reported thresholds from the v1.0 patch, the early tiers arrive quickly while the later tiers require deliberate farming.
Early Oath Tiers (Levels 1–10)
The first ten tiers of the Ratatan goddess altar are designed to pull a new account out of the Welcome Mode trap by front-loading permanent Ratatan oath level rewards — Cobun Attack and Health bumps, the Medama Boost that improves Chorus-to-Cobun conversion, and an early Weapon Level Cap +1 — so a fresh save clears Episode 2 without needing to lean on the Melodium deposit refund or other late-tier difficulty exploits.
-
Tier 1–3: Small stat bumps to Cobun Attack, Cobun Health, and base Ratatan stamina. The first Adventure Upgrade slot opens here.
-
Tier 4–5: Unlocks the Medama Boost perk, which increases the conversion rate of Chorus into Cobun, and adds the first row of the Goddess Lottery.
-
Tier 6–10: Introduces Weapon Level Cap +1 (permanently raising how far weapons can be limit-broken), and grants a small refund of Melodium on each run's deposit — making the early grind feel less punishing.
Mid Oath Tiers (Levels 11–25)
The middle band (Levels 11–25) is where most Episode 3 players camp on the ratatan goddess altar, because these tiers open the real reward structure and feed the meta-progression economy that drives your runs forward. Specifically, this is where you stop paying Melodium purely for flat stat boosts and start unlocking permanent build-defining upgrades — an extra Cobun slot, accelerated Melodium gain, and the gated Super Lottery premium track via the Oath Key Fragment. In practice, skipping this band leaves your ratatan adventure upgrades stuck at Episode 1 scaling, so prioritizing tiers 11–15 before chasing cosmetics is the most efficient oath level rewards path for mid-game accounts.
-
Tier 11–15: Adds a permanent Cobun Slot +1 (more followers per run) and unlocks the Support Desk Discount upgrade.
-
Tier 16–20: Triggers the first Goddess Super Lottery row, plus a permanent increase to Melodium gain per run.
-
Tier 21–25: Awards the Oath Key Fragment, which is a multi-piece item that eventually unlocks the Super Lottery's premium track. This is the first real gating wall.
| Oath Tier Range | Key Reward | Practical Impact |
|---|---|---|
| 1–3 | Base stat boosts | Stable Episode 1 clears |
| 4–5 | Medama Boost + Lottery access | First cosmetic + small stat rolls |
| 6–10 | Weapon Cap +1 | Easier limit-break runs |
| 11–15 | Cobun Slot +1 | Stronger Cobun swarms |
| 16–20 | Super Lottery + Melodium gain | Faster altar grinding |
| 21–25 | Oath Key Fragment | Gates Super Lottery premium |
The exact Melodium cost per tier scales non-linearly across the ratatan oath level rewards curve, so a flat budget plan will fail before you even reach tier 15. Community data pegs tier 10 at roughly 3,500 Melodium, tier 15 at around 7,200, tier 20 near 12,000, and tier 25 stretching past 18,000 — meaning the per-tier delta roughly doubles across the mid band. Because Cobun Slot +1 (tier 11–15) and the Oath Key Fragment (tier 21–25) sit at the steepest jumps, the smart move is to grind your ratatan adventure upgrades around the Support Desk Discount unlock before pushing into the Super Lottery gating wall, since saving 10–15% per Melodium purchase compounds hard over 15+ altar visits.
Ratatan Melodium Guide: How the Currency Flows
Melodium is earned exclusively through completed runs, but the per-run yield varies wildly depending on how the run is structured. A reckless speedrun typically deposits 200–400 Melodium, while a deliberate all-chapter clear with high boss streaks can push 1,200+ on a single deposit. The altar screen displays the deposit summary after each run, including a breakdown of which episodes contributed the most Melodium and which boss phases triggered bonus drops.
Primary Melodium Sources
The biggest chunk of Melodium comes from episode completions, with Episode 1, 2, and 3 each contributing a fixed baseline on clear. Boss phases add bonus Melodium on top of the baseline, especially when a phase is cleared without a Ratatan death. The community refers to the bonus window as the Clean Phase Bonus, and it is the single highest-Melodium multiplier in the game.
Secondary sources include Cobun milestones (hitting 10, 25, and 50 Cobun under command in a single run), Medama donations to the dock, and shrines activated during a run. The shrine mechanic is the most overlooked: each shrine gives a one-time Melodium bonus, but only the first shrine per episode counts toward the run's total, so map knowledge matters.
| Melodium Source | Approx. Yield per Run | Conditions |
|---|---|---|
| Episode 1 clear | 200 | Any clear |
| Episode 2 clear | 350 | Any clear |
| Episode 3 clear | 500 | Any clear |
| Clean Phase Bonus | +150 to +400 per phase | No Ratatan death in phase |
| Cobun milestone (10) | 80 | Reach 10 active Cobun |
| Cobun milestone (25) | 150 | Reach 25 active Cobun |
| Shrine activation | 50–120 | First shrine per episode only |
How to Spend Melodium Wisely
A common mistake is dumping Melodium into the Adventure Upgrades tab as soon as it unlocks. Early on, the Oath Level stats provide a higher return per Melodium spent because they compound across every future run. A good rule of thumb is to push the Oath Level to at least tier 10 before touching Adventure Unlocks, then alternate between Oath milestones and the highest-impact Adventure upgrade available.
Players chasing the Episode 4 true ending should follow the Ratatan episode progression walkthrough, which maps the exact altar spending order against the unlock requirements for the final chapter — note that the goddess altar's last three offerings only become available after the Oath Level hits tier 15 and the Final Chapter Keystone is crafted from the Adventure Unlocks tree, so front-loading Melodium into the wrong tab can delay that trigger by 2-3 full run cycles.
Ratatan Upgrade Guide: Choosing What to Buy First
The Adventure Upgrades tab is the altar's most varied section, and the order in which upgrades are purchased meaningfully changes how a run plays. Some upgrades add entirely new mechanics — like the Rescue Whistle, which lets a stranded Cobun teleport back to the Ratatan — while others are pure stat boosts that quietly amplify existing systems.
High-Impact Adventure Upgrades
These three early-game altar investments are the highest return-per-Melodium nodes in the entire Ratatan oath level rewards tree, because each one directly compounds the value of subsequent purchases — faster Cobun conversion means more bodies on screen, cheaper dock prices mean more Melodium survives to feed the goddess altar, and fewer lost Cobun means your late-game scaling never collapses mid-run.
-
Medama Boost (Oath 4 unlock): Speeds up Chorus-to-Cobun conversion, which is the foundation of every strong run.
-
Support Desk Discount (Oath 11 unlock): Reduces the in-run cost of dock purchases, letting more Melodium carry forward to the altar.
-
Rescue Whistle (Oath 8 unlock): Prevents lost Cobun from snowballing into a run-ending deficit.
After those three, priority shifts based on playstyle. Aggressive players chasing faster clears prioritize Cobun Attack +1 and Weapon Damage +5% since the extra DPS lets them thin swarms before the late-wave Ratatan escalation, while defensive players stretch runs by stacking Cobun Health +10% and Ratatan Stamina Recovery +1 to keep their frontline alive through the goddess altar's toughest Oath 20+ encounters.
Adventure Upgrades vs. Weapon Upgrades
Players often conflate altar upgrades with weapon upgrades, but the two systems are deliberately separate. The altar's Weapon Cap and Weapon Damage upgrades raise account-wide baselines, while the in-run weapon crafting system handles individual weapon growth. Both feed into the same damage output, so ignoring either side leaves a permanent gap in the build.
The Ratatan weapon crafting guide covers the in-run half of the equation, including how limit break interacts with the altar's Weapon Cap +1 perk. Players who hit Episode 3 and feel their weapons suddenly underperform usually discover that they pushed one system while ignoring the other, which is why the altar's stat boosts feel invisible until paired with active weapon investment.
Ratatan Meta Progression: How the Altar Shapes Long-Term Runs
Meta-progression in Ratatan is the altar's job, and the design treats each deposit as a vote toward the kind of run the player wants next. After 20+ hours of play, a typical account's altar investment will bias the run generation toward either a Cobun-heavy swarm build, a weapon-crafting specialist build, or a hybrid that leans on both. The system never forces a build, but the Melodium pool is finite enough that choices carry weight.
Building Around the Altar
The strongest accounts are the ones that invest in two stat families before touching the cosmetic and lottery systems. Most community-veteran accounts settle on a Cobun swarm base (Oath levels 1–15 focused) layered with a Weapon Cap investment (Adventure Upgrades tab) for boss-phase damage. This combination clears Episode 3 reliably while leaving enough Melodium to chip at the Super Lottery track.
Players who try to spread Melodium across every altar tab before hitting tier 25 typically stall in Episode 3 and report feeling underpowered. The meta-progression is intentionally gated to reward focus, and the altar screen flags recommended next-purchase upgrades based on the player's most recent run's performance.
Carrying Progress Between Difficulties
Difficulty changes also flow through the altar. Welcome Mode clears deposit Melodium at a reduced rate, and the Ratatan difficulty guide explains when switching to the next difficulty tier actually accelerates altar progress. Higher difficulties pay more Melodium per phase and unlock harder boss patterns, but the run failure rate also climbs, so the altar's real job is to bridge the gap until the player's skill matches the difficulty.
| Difficulty Tier | Melodium Multiplier | Recommended Oath Level |
|---|---|---|
| Welcome Mode | 1.0x | 1–5 (learning tier) |
| Normal | 1.4x | 6–15 (farming tier) |
| Hard | 1.8x | 16–25 (prestige tier) |
| Risky | 2.3x | 25+ (challenge farming) |
The Ratatan Steam package page groups the Standard and Deluxe editions, and Deluxe owners start with a small head start on the altar's cosmetic track (which does not affect Oath Level but does affect the lottery pool). That head start is small enough that it does not meaningfully change the meta-progression economy for new players, but it is worth noting for buyers comparing the two editions on the Ratatan Steam page.
Synergy With Permanent Upgrades
Outside the altar, the Support Desk and shop systems also accept Tokens — a separate currency that complements Melodium for cosmetic and QoL upgrades. Players who want a fully optimized meta-progression loop should treat the altar and the Support Desk as two halves of the same system. The Ratatan permanent upgrades guide covers the Support Desk side, including which Token upgrades actually move the needle on run consistency and which are traps.
Frequently Asked Questions
What is the Ratatan Goddess Altar and why does it matter?
The Ratatan Goddess Altar is the central meta-progression hub where Melodium earned from each run is deposited as permanent account-wide power. It unlocks Oath Level stat boosts, Adventure Upgrades, and the Goddess Lottery systems that gate the rarest cosmetic and weapon rewards in the game.
How many Oath Levels are there in Ratatan?
The altar's Oath Level track currently extends past tier 25 based on community data, with the v1.0 patch confirming tiers 1–30 as the documented range. Each tier costs more Melodium than the last, and tier 25 is widely treated as the first major prestige wall because it requires roughly 18,000 Melodium to clear.
What is the fastest way to farm Melodium in Ratatan?
The fastest Melodium farming path is to chain clean boss phase clears in Episode 2 and Episode 3, since the Clean Phase Bonus adds 150–400 Melodium per phase on top of the episode baseline. Cobun milestones and first-shrine activations per episode add a smaller but consistent layer of yield.
Should I spend Melodium on Adventure Upgrades or Oath Levels first?
Oath Levels should come first because they compound across every future run, while Adventure Upgrades only activate once purchased. Community testing suggests pushing to at least Oath tier 10 before buying the first Adventure Upgrade, after which the two systems should be invested in parallel.
Do the Goddess Lottery and Super Lottery affect meta-progression?
The Goddess Lottery and Super Lottery mostly distribute cosmetic rewards and small stat rolls, but they feed back into meta-progression by occasionally granting Melodium refunds or rare Cobun cosmetics. The Super Lottery requires Oath Key Fragments gathered at higher Oath tiers, which is why the altar's tier milestones matter even for players who care mostly about cosmetics.