
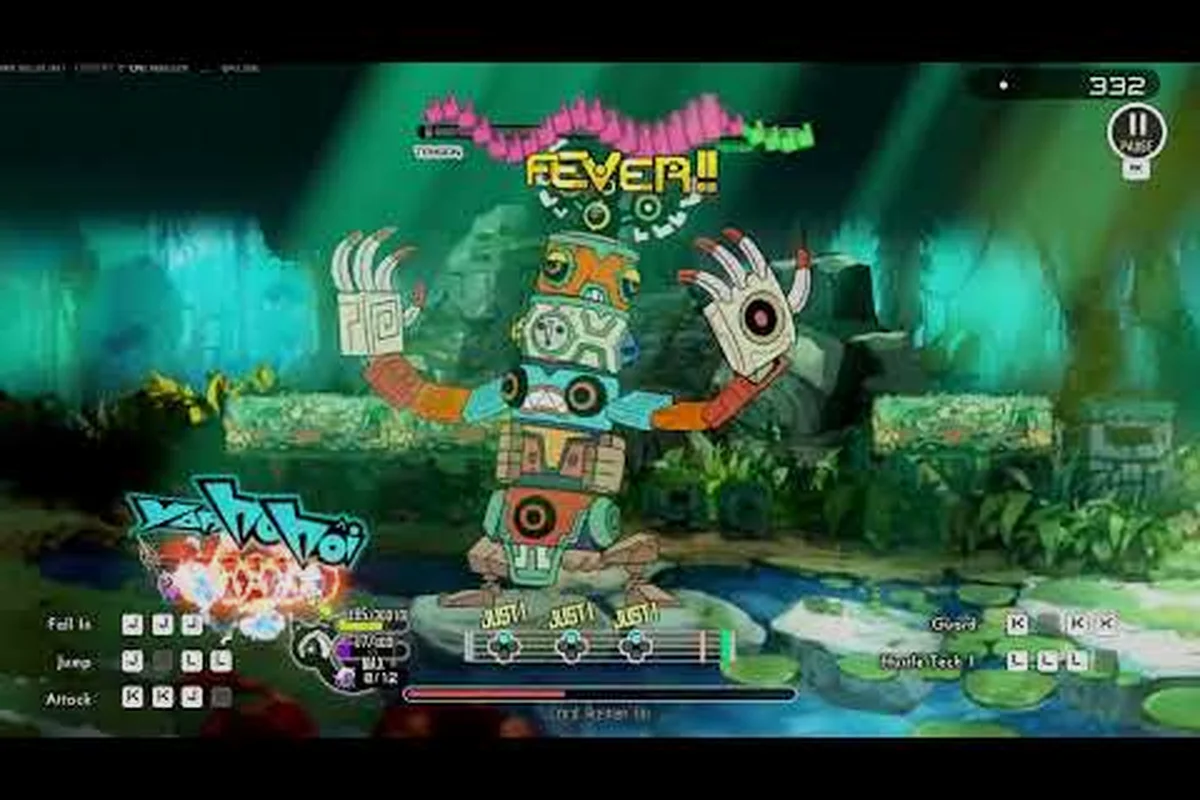
The Ratatan Captain Barbatoid boss stands as the climactic gatekeeper of the final world in Ratatan's 1.0 release, a fight that compresses everything the rhythm-roguelike has been teaching players into one extended encounter. Anyone pushing through Episode 4's last stretch will hit this crab-armored commander, and the version-1.0 build that shipped across Steam, Nintendo Switch 2, PlayStation 5, and Xbox Series X|S in October 2026 makes Captain Barbatoid meaningfully harder than the earlier bosses players may have practiced on, including the Ratatan Scorpswoosh Bill boss, the Ratatan Dekadon boss, and even the Ratatan The Jolly Hermit boss that previously served as a skill check. This guide breaks down the patterns, hard mode adjustments, and timing windows that turn a wall of chip damage into a clean clear.
Captain Barbatoid is unusual among Ratatan's roster because the encounter is built around rhythm-locked telegraphed strikes rather than pure chaos. The boss queues a beat pattern, fires a combination of swipes, charges, and shell-burst AoEs, then pauses for a short window where your ratatan party can retaliate. The 1.0 tuning shifted those pause windows slightly tighter than the Early Access build, which is why many players who coasted through the Ratatan Dekadon boss and the Ratatan The Jolly Hermit boss are now hitting the floor for the first time at the very end of the run.
Captain Barbatoid Encounter Overview
Captain Barbatoid sits at the end of Episode 4's final world, a region themed around coastal defenses and brass-plated war machines. The boss arena is a long, flat dock section with limited cover, which means positioning matters more than hiding. Players enter the fight at the same oath level they brought into the world, and that oath level is the single biggest factor in how much punishment the boss dishes out.
The encounter has three explicit phases plus a short enrage window, and the transition between each phase is marked by a unique musical sting that doubles as your warning to reposition. The first phase is a tutorial-grade set of single-target swipes designed to teach the timing window. The second phase adds shell fragments that litter the arena. The third phase opens up the full kit, and the enrage window is a flat-damage race that lasts roughly twenty seconds.
Phase Structure and Visual Cues
Each phase transition is announced by a distinct visual change rather than a health bar, which catches a lot of first-time players off guard. Barbatoid's claw glow shifts from orange to red at the end of phase one, his shell plating cracks visibly at the start of phase three, and the enrage is telegraphed by a sustained red pulse around the boss model.
| Phase | Health % | Primary Attacks | Telegraph Length | Recommended Action |
|---|---|---|---|---|
| 1 (Opening) | 100–70 | Single claw swipe, forward charge | ~1.0 seconds | Hit on the beat, learn the rhythm |
| 2 (Shrapnel) | 70–40 | Swipe combo, shell-burst AoE | ~0.75 seconds | Clear fragments, hold formation |
| 3 (Full Kit) | 40–10 | All attacks + spin attack | ~0.5 seconds | Burst the boss before enrage |
| Enrage | <10 | Rapid AoE, no telegraph | 0 seconds | Survive 20 seconds, then finish |
The telegraph compression is the most important detail in this table. Players who treat the Ratatan Captain Barbatoid boss the same way they treated the Ratatan Scorpswoosh Bill boss will find the timing windows too tight to react by phase three, and the boss's attack cadence accelerates well past anything the earlier encounters demanded.
Hard Mode Adjustments
Hard boss mode in Ratatan is unlocked through a separate run structure that ramps both enemy damage and enemy speed, and the Ratatan hard boss guide community has flagged Barbatoid as the steepest jump in the entire 1.0 campaign. According to the Ratatan Full Release announcement on Steam, the 1.0 version shipped the final world with all Dark Ratatan bosses present simultaneously, which means players cannot avoid Barbatoid on the path to the credits.
On hard mode, the boss gains three mechanical changes that compound each other. First, every telegraph window is shortened by roughly fifteen percent across all three phases. Second, the shell-burst AoE in phase two spawns a second ring of fragments on a delayed timer, so the safe zone shrinks mid-fight. Third, the enrage window extends to about thirty seconds instead of twenty, which sounds like a reprieve but is actually a longer survivability check because Barbatoid's damage in that phase scales much harder than his health.
| Adjustment | Normal Mode | Hard Mode | Player Impact |
|---|---|---|---|
| Telegraph length (P1) | 1.0 sec | 0.85 sec | Less reaction time for first-time clears |
| Shell-burst rings (P2) | 1 ring | 2 rings (delayed) | Forced reposition mid-combo |
| Enrage duration | ~20 sec | ~30 sec | Longer survival check, not easier |
| Boss contact damage | 1x | 1.4x | One-shot risk on poorly positioned rats |
| Fragment lifetime | 4 sec | 6 sec | Arena stays cluttered longer |
Players coming from the Ratatan Dekadon boss fight should expect roughly the same damage scaling but with much less forgiveness on positioning. The Ratatan hard boss mode also tightens the rhythm lock — your inputs during the pause window have to land closer to the beat to count as a clean hit, which is the single biggest source of lost damage on this fight.
Attack Pattern Breakdown
The Ratatan boss patterns for Captain Barbatoid are unique to this encounter and do not reuse moves from the earlier fights. Players who memorized the Ratatan Scorpswoosh Bill boss patterns will find the timing windows familiar but the attack geometry very different. Barbatoid is a frontal boss — almost every attack originates from his front arc — but the shell-burst AoE in phase two is a full 360-degree ring that punishes players who try to flank.
Single Claw Swipe (Phase 1+)
Barbatoid's signature opening move is a wide claw swipe that covers a roughly 120-degree arc in front of him. The telegraph is a raised arm with a one-beat windup, and the swipe itself lands on the next downbeat. The attack does moderate damage and applies a brief stagger if it connects, which can chain into a follow-up charge if you are caught in the wrong position.
The clean counter is to bait the swipe by standing just outside the arc, then dash inward on the beat after the claw hits the ground. This mirrors the dodge pattern used against the Ratatan Dekadon boss, but the timing window is half a beat shorter, so players who learned that fight on hard mode have a real advantage here.
Forward Charge (Phase 1+)
A linear charge that covers about half the arena length. The telegraph is a brief crouch with the shell tilted forward, and the charge itself takes exactly two beats to complete. The charge is a one-shot kill on hard mode for any rat in the direct path, and the boss will track slightly to follow a fleeing target.
The standard counter is a lateral dash on beat two of the telegraph, which puts you beside the boss at the end of the charge. This opens a short retaliation window because Barbatoid's recovery animation locks him in place for about one beat, which is the same window the Ratatan The Jolly Hermit boss gives players after his spin attack, so the muscle memory transfers cleanly.
Shell-Burst AoE (Phase 2+)
The defining move of phase two is a 360-degree ring of shell fragments that scatter across the arena. The telegraph is a glowing pulse around the boss's shell, and the burst happens on the third beat after the pulse appears. The fragments persist for several seconds and deal chip damage on contact, which makes the arena progressively harder to navigate as the phase continues.
On hard mode, the second delayed ring lands about two beats after the first, so the safe zone shrinks in the middle of the burst. The reliable counter is to push to the edge of the arena before the telegraph completes, then walk inward after the second ring resolves. Trying to dash through the fragments is a common mistake that wipes runs on the Ratatan hard boss guide leaderboards.
Spin Attack (Phase 3)
Phase three adds a rapid spin that hits multiple times over a roughly two-beat window. The telegraph is much shorter than the earlier attacks, which is why the phase three damage ramp is the most common wall for new players. The spin does less damage per hit than the charge, but it hits up to three times, so the total damage is comparable.
| Attack | Phase | Telegraph | Hits | Damage (Normal) | Damage (Hard) |
|---|---|---|---|---|---|
| Claw Swipe | 1+ | 1.0 sec / 0.85 sec hard | 1 | Moderate | High |
| Forward Charge | 1+ | 2 beats | 1 | One-shot | One-shot |
| Shell-Burst AoE | 2+ | 3 beats (2 rings on hard) | Persistent | Chip | Chip + zone denial |
| Spin Attack | 3 | 0.5 sec / 0.4 sec hard | Up to 3 | High | Very High |
Reading these patterns as a single rhythm rather than four separate attacks is the key insight most community guides miss. Barbatoid's attack sequence is designed so that the telegraphs line up with the music's downbeat, and players who internalize that beat structure can pre-position rather than react, which is the difference between a clean clear and a barely-survived enrage.
Pre-Fight Preparation and Loadout
The encounter is hard enough that preparation matters as much as execution. Players going in without a tuned loadout will hit a damage wall in phase three, and players going in with the wrong composition will struggle to clear the shell fragments on hard mode. The good news is that Barbatoid is a well-documented fight, and the Ratatan news hub on Steam has been keeping the community updated on balance changes since launch.
Party Composition
Barbatoid is a single-target boss with a punishing AoE phase, which means the optimal party balances sustained single-target damage with at least one character who can clear shell fragments. Pure damage compositions work on normal mode but fall apart on hard because the fragments will trap the party in the wrong quadrant.
| Role | Recommended Archetype | Key Trait | Why It Works |
|---|---|---|---|
| Main DPS | High-tempo melee | Fast beat-locked strikes | Maximizes the pause window damage |
| Burst DPS | Heavy single-target | Slow but huge hits | Punishes phase transitions |
| Support | Rhythm buffer | Extends the pause window | More time to clear fragments |
| Cleaner | AoE clear | Removes shell shards | Keeps the arena navigable |
The rhythm buffer support slot is the most underrated choice for this fight. The trait extends Barbatoid's pause window by roughly a quarter-beat, which sounds small but compounds over a three-phase fight into several extra seconds of free damage. On hard mode, that buffer is the difference between bursting the boss before the enrage and running out of time.
Oath Scaling Before the Barbatoid Fight
Oath level is the primary stat that determines how much damage both the player and the boss deal, and the Ratatan hard boss mode doubles down on the oath scaling. The recommended minimum for a clean clear of Barbatoid on normal mode is an oath level that matches the world tier, but on hard mode players report needing roughly one tier above the world to survive phase three without burning their healing charges.
Players looking for a more granular breakdown of how oath level interacts with boss damage should check the Ratatan difficulty guide, which maps oath thresholds against each boss's damage curve. The interaction between oath level and Barbatoid's enrage phase is especially important because the boss's contact damage scales faster than the boss's health at high oath levels, so over-oathing is a real risk on this fight.
Phase-by-Phase Execution
The execution differs enough between phases that each one deserves its own walkthrough. Players who try to play all three phases the same way will burn out their healing charges in phase two and limp into phase three without the resources to burst the boss. The phase-by-phase breakdown below assumes normal mode timings; hard mode values are noted where the change is significant.
Phase 1: Learning the Rhythm
The opening phase is built to be the easiest part of the fight, but it is also the most important for setting up the rest of the encounter. Barbatoid opens with three single-target swipes, each spaced one beat apart, and then a forward charge. The pattern repeats twice before the phase transition.
The goal in phase one is to learn the telegraph rhythm without burning resources. Players should focus on landing clean hits during the pause window and avoiding the charge by dashing laterally on the second beat. The charge is a one-shot on hard mode, but the swipes do moderate damage, so positioning outside the arc is more important than trying to tank the hit.
A common mistake is to overcommit to damage during phase one because the pause window feels generous. By phase three, the same window shrinks to a fraction of a beat, and players who built their muscle memory on the phase one timings will miss the hit windows in phase three. Treat phase one as practice, not as free damage.
Phase 2: Arena Control
Phase two is where most normal-mode runs start to slip because the shell-burst AoE changes the arena geometry. Fragments persist for several seconds, so the safe zones shrink as the phase continues, and players who stand in the wrong quadrant will eat chip damage for the rest of the phase.
The correct approach is to push to the arena edge immediately after the first burst, then walk inward as the fragments clear. On hard mode, the second delayed ring lands about two beats after the first, so the edge of the arena is the only safe position during the burst sequence. Players who try to clear fragments in place will get caught by the second ring and lose a quarter of their health.
The DPS window in phase two is shorter than phase one, but the pause between Barbatoid's attacks is longer because the shell-burst animation locks him in place. The reliable counter is to bait the burst, reposition to the edge, then use the longer pause window to clear fragments and land a single heavy hit before the next pattern starts.
Phase 3: Burst Window
Phase three is the make-or-break segment of the fight. Barbatoid's telegraph windows are cut in half, his spin attack can chain up to three hits, and the enrage triggers at ten percent health. Players who reach phase three with full healing charges and a clean rhythm have a very high clear rate; players who limp in with chipped resources will not burst the boss in time.
The execution priority in phase three is survival first, damage second. The spin attack's short telegraph means reactive dodging is unreliable, so players should pre-position based on the beat rather than trying to read the boss's windup. Standing in the boss's flank rather than directly in front cuts the spin's hit count from three to one, which is the single biggest damage reduction available in this phase.
The enrage window is a flat survivability check. Barbatoid's damage scales much harder than his health at low percentages, so the goal is to survive roughly twenty seconds (thirty on hard mode) and then burst the boss when the enrage pulse ends. Players who try to race the enrage with raw damage output will lose the race, because the boss's contact damage in the enrage window is high enough to one-shot most rats.
Common Mistakes and How to Fix Them
The Ratatan hard boss guide community has catalogued a consistent set of mistakes that trip up first-time clears, and most of them come from overgeneralizing patterns learned on the earlier bosses. Players who cleared the Ratatan The Jolly Hermit boss and the Ratatan Scorpswoosh Bill boss cleanly often treat Barbatoid as a harder version of those fights, but the encounter is mechanically distinct enough that the carry-over only goes so far.
Mistake 1: Standing in Front During Phase 3
The most common wipe in phase three is eating the full spin attack because the player is positioned directly in front of the boss. The spin's hit count drops from three to one when the player is at the boss's flank, but the telegraph is short enough that repositioning mid-attack is unreliable. The fix is to default to a flank position from the start of phase three, which costs a small amount of damage per cycle but prevents the spin from snowballing into a follow-up charge.
Mistake 2: Trying to Clear Fragments in Place
The shell-burst fragments are tempting to clear because they are a visible threat, but clearing them in place is what gets players caught by the second delayed ring on hard mode. The reliable counter is to push to the arena edge during the burst, then walk inward as the fragments clear naturally. This is a slower clear but a much safer one, and the rhythm buffer support trait makes the timing window much more forgiving.
Mistake 3: Over-Oathing for Hard Mode
The instinct on hard mode is to push the oath level as high as possible to maximize damage, but the Ratatan Captain Barbatoid boss punishes over-oathing because the boss's damage scales faster than the boss's health. The sweet spot for hard mode is roughly one oath tier above the world level, which gives enough damage to burst the boss in phase three without the enrage window becoming a one-shot race.
Mistake 4: Burning Healing in Phase 1
Phase one feels safe, which leads players to spend their healing charges early on chip damage that they could have dodged. The cleanest runs hold all healing charges until phase two, when the shell-burst fragments make unavoidable damage a real possibility, and phase three, when the spin attack's short telegraph makes perfect dodging unrealistic. Players who burn their first heal in phase one will limp into the enrage window with no resources to spare.
Frequently Asked Questions
How does the Ratatan Captain Barbatoid boss compare to the Ratatan Dekadon boss in terms of difficulty?
Barbatoid is meaningfully harder than the Ratatan Dekadon boss because the telegraph windows are tighter, the spin attack in phase three can chain up to three hits, and the enrage window lasts longer on hard mode. The Dekadon fight rewards positioning; the Barbatoid fight rewards rhythm-locked execution on top of positioning, which raises the mechanical skill ceiling.
What oath level should I reach before fighting Captain Barbatoid on hard mode?
The community-recommended minimum for the Ratatan hard boss guide clear of Barbatoid is roughly one oath tier above the world level. Pushing higher than that actually reduces clear rates because the boss's contact damage scales faster than his health, so the enrage window becomes a survivability race rather than a damage race.
Can I solo the Ratatan Captain Barbatoid boss without a full party?
Yes, but the rhythm buffer support trait is almost mandatory for solo clears because it extends the pause window enough to land a full combo in phase three. Without that buffer, the solo player runs out of damage time before the enrage triggers, which is the most common cause of solo wipes according to community reports.
How long is the Captain Barbatoid enrage window?
The enrage lasts roughly twenty seconds on normal mode and about thirty seconds on hard mode. The longer hard-mode duration sounds easier but is actually harder because the boss's damage in that phase scales much higher than the duration extension accounts for, so the longer window is a survivability check rather than a reprieve.
Does the boss order matter for unlocking Barbatoid?
Barbatoid is the final boss in Episode 4, so players must clear the Ratatan Scorpswoosh Bill boss, the Ratatan Dekadon boss, and the Ratatan The Jolly Hermit boss before they can reach him. Players looking to optimize the run-up should check the Ratatan episode 4 unlock guide for the fastest path through the prerequisite content.